
Office Hours: System & Database Integrations with Kofax RPA
Kofax RPA is a powerful robotic process automation platform with a simple drag-and-drop software robot designer. Kofax RPA automates manual tasks and activities like accessing web portals or desktop applications, connecting to servers and databases, and copying and transposing data, replacing the need for cumbersome data integrations between systems and databases.
Transcript
Quinn Huntsman:
Hello, and welcome to another RPI Consultants office hours. Today, we’re going to be diving into the world of Kofax RPA, specifically Kofax RPA working with various enterprise systems, working with APIs, and also showing you at a high level how to create a database integration. Before we get started here, just a couple of housekeeping items. First thing, we want to let you know that we have a couple of upcoming webinars as well as another office hours here in June.
Friday, June 19th, at 1:00 PM Central we’ll have another office hours on iScripts for Perceptive Content or otherwise known as ImageNow. This as a part to follow up presentation to another office hours we did on Perceptive iScripting, I think a couple of months ago. So, if you watched that or if you are interested in learning iScripting and Perceptive Content, I would definitely tune in for this.
Following that to kick off for July, we have a double header on Wednesday the 1st, starting at 11:00 AM. We’re going to have a webinar on Perceptive Content enhancement pack two. This is the summer release of Perceptive Content. So, we’ll be giving you all the details on that new release. And then later in the afternoon that day we have, at 1:00 PM Central, a webinar on making OnBase work with Infor.
So, if you like our office hours or have attended our office hours or webinars in the past, definitely check these out. If you need any more information on our webinars or office hours, be sure to visit rpic.com/webinars. Next step, I want to let you know about a workshop we offer for Kofax RPA. This is an engaging onsite kind of like a training workshop we do for Kofax RPA.
So, we will set you up with one of our RPA consultants and this includes things like some documentation and roadmapping on how you might be able to use RPA for your organization. We will set you up with a free one-year development license for Kofax RPA. This is something we can help you obtain through Kofax. We will also provide you product setup and training as well as discuss robot prototyping and deployment for your organization.
So, if you’re interested in scheduling or discussing what this might look like for you and your organization, be sure to reach out. A little bit about me before we get started. My name is Quinn Huntsman. I’m a business analyst on the CPA team here at RPI Consultants. I am a certified technical solution specialist for Kofax RPA.
Other than that, my background is in Perceptive Content; specifically, I work a lot with upgrades, general administration and various troubleshooting. Fun fact about me: I’m currently re-watching some shows at home, enjoying that as well as enjoying practicing cooking at home since we have the time to do that. So, to outline what we’re going to cover today, we are going to be talking about system integrations and database integrations with Kofax RPA.
Usually, we have these presentations live. So, we want to remind you that they’re interactive. But this one happens to be pre recorded. So, if you have any questions about what you saw today, be sure to reach out to us whether it’s on our website or through our YouTube channel or just email us. So, another thing before we get started. I want to make sure to outline just exactly what is Kofax RPA, if this is your first-time hearing about it or watching one of our RPA webinars.
So Kofax RPA stands for Robotic Process Automation. So, it easy to use drag-and-drop software that allows you to build robots that don’t stop working and they never make mistakes. It can replace manual tasks and allow you to build decision points for activities like opening and signing into desktop applications or web portals. It can even perform front end activities, functions, lookups, as well as kind of what we’re going to be diving into today, which is work with APIs and/or databases.
Again, it is a simple to use. You don’t have to know how to code. A drag-and-drop interface that allows you to build robots, even with some complex logic in there. And the last thing I want to mention about this here is that there is a free one-year development license available from Kofax. So, I encourage you all, if you are interested in Kofax RPA, to go obtain that license and solve the software and give it a shot.
So just to provide an agenda of what we’re going to do today. We’re going to show RPA working with databases and APIs. So, the advantages to doing this. A lot of work with RPA will involve working with the front end of a website, which can be frustrating at times, depending on the website. Not all websites are built the same. Not all websites support working with them from an RPA standpoint.
So, what working with APIs and databases allows you to do is skip the front end of the website and work directly with the data that you need from that. So, we are going to demonstrate how to retrieve, create, update, and delete records. One of the main benefits here really with RPA is that it allows you to create integrations that would otherwise not exist between systems.
So hopefully this demonstration today gives you an idea of the robustness of Kofax RPA and just how that can work. So, what we’re going to do is leverage a call REST web service step to create a document and Perceptive Content. The web service we’re going to consume is going to be integration server. This is a web service available to communicate with Perceptive Content server.
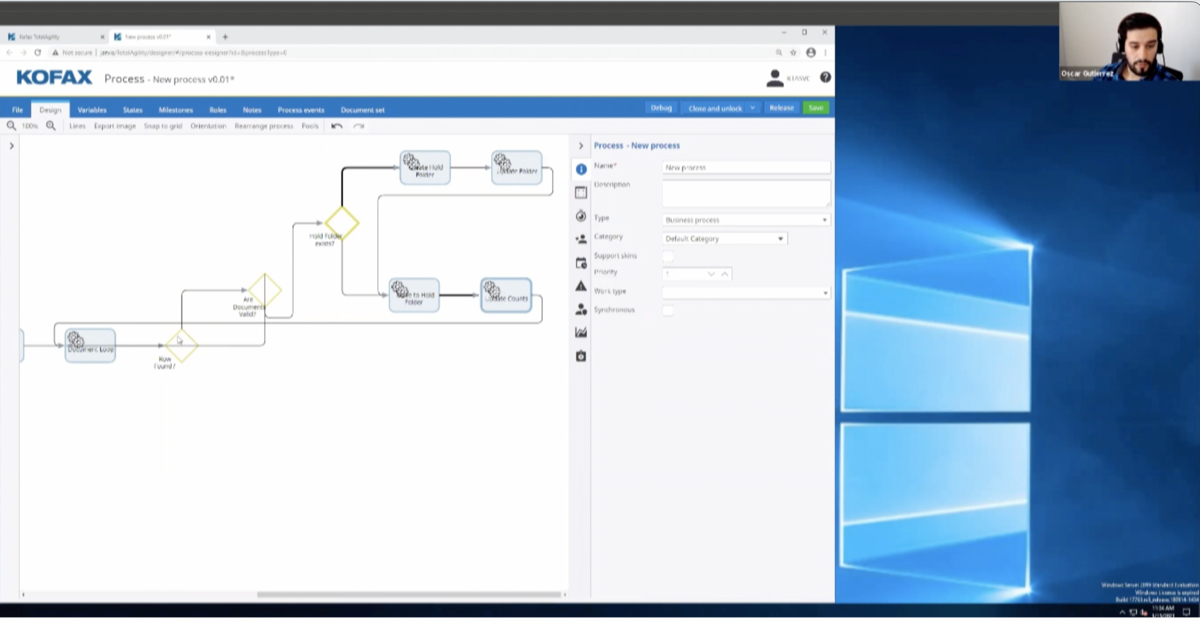
And then what we’re going to do once that’s done is, we’re going to demonstrate connecting to Microsoft SQL server and then querying the database to find that document that we created. So, without further ado here, let’s go ahead and get started. I’ve got a prebuilt version of the robot here, but we’re going to build it from scratch again. I just want to show you kind of how simple this can be, and also give you a quick tour of what you’re actually looking at.
So, the view here is what’s called Kofax RPAs design studio. It is the development environment, the IDE for Kofax RPA. In the middle here you’ve got your workflow view essentially, showing all the different steps. That’s what these gray little boxes are. You can see the progression of them down here in the bottom half of the middle of the screen. This is where you’ll see the output from your execution here.
Over on the left you can see we’ve got some basic folder structure. This is kind of like if you’ve ever worked in Microsoft Visual Studio, this is pretty much your project view. It helps you stay organized with your robots, types and all of that, which we’ll explain a little bit more about as we go here. You’ll notice here on the bottom left we have our database information.
This will be important later on. This will show where we connect to our databases, which databases are available from the management console, which we’ll also discover here. And then which databases have been mapped and are available in design studio for you to actually build with. So lastly, here is our variables pane over here on the right. This is the building blocks of our project here.
This will allow you to create empty boxes to hold all the data you need to as you go here. So, for instance we need to have some kind of variable to hold the data that we are returning from SQL when we query the database to find the document we create. So, I have a variable here created to store all of the different columns for that, as well as I have some login credentials here pre created and then some other things here that we’ll use as well.
What you’re seeing in the bottom right corner is a configuration panel for the step that you’re on. So, this shows you the different options for what you’re building as far as the step itself. You can also get here by right clicking and going to configure for the step, or you can just hit F2 to get there as well. So, the first thing I want to give you a look at is the power of RPA and how it works with web services.
So, what we’re going to be leveraging is working with a REST web service. And this first step here is just one I’ve renamed, but we can look at the options for call REST web service. So, the first thing it wants for a REST web service is an end point. And so, this part of it is something where there’s no really hard and fast rule for working with an RPA.
You just kind of have to learn a little bit about the specific API you’re working with, dive in and get that information, test it out. There is a very handy tool that I use a lot called Postman. That’s very good when you’re trying to test and work with APIs initially. If it’s easier for you to use a tool like that before migrating that work into RPA, I highly recommend checking out Postman.
But with the integration server API we’re going to be leveraging today, I happen to know that there’s documentation available on Hyland’s site for integration server. And this specific page here shows an example of all the different operations or API calls you can make to integration server, as well as an example of how to build those. So, here’s an example of one we’ll be using today.
This is a POST call we’ll be making to an integration server to create a document. And here is a JSON body that shows an example of how you might do that. Again, this part, you kind of have to do a little bit of prerequisite research to make sure you understand what’s available with the API you’re planning to work with and just how you might go about making those calls.
Now, once you have that kind of backlogged, it’s pretty standard and pretty easy once you get into RPA to take all of that and sort of plug it in. So again, we have our URL, which is our end point. The first thing before we create a document that we’re going to do is just test our connection to the integration server. So that’s why we have that here.
Another thing that’s good to do before you start working with APIs is make sure the server where you actually have the roboserver installed can communicate with the server where the web service you are looking to consume actually lives. So, I happen to know that these two servers can ping each other just well, which is a good way to test that.
Additionally, integration server has a test page we can use. So, I’m going to show that really quick, if I can spell. There it is. This is integration server successfully showing the version of the integration server that we’re working with. And if I can reach this page, that means this service can communicate to my server and vice versa. So that’s kind of a good little pretest to do, if you will, before continuing your build.
It’s good to get all those issues out of the way before you start getting into design studio and struggling with them. If you have any firewall issues or anything like that, it’s good to discover that before you get in here and experience that. So, there’s a couple of ways you can do that. What we have next here in our call REST web service step is the request type that we’re making.
So, we want to try and retrieve a connection from the integration server. So, this is a GET request. A REST web service has a pretty standard set of request types. So, the first is GET, which is straightforward enough. We’re trying to get information from the web service. The next is POST. This is if we’re sending data to the server, which we will use a POST type when we actually are creating a new document against the system.
PUT. This is an update call. Patched down here is also a update call. These work a little bit differently than each other. One is a destructive update. The other is nondestructive, I believe. And one replaces the entire record on the server, and I believe patches the ladder here. You can send along specifically what you want to update for that record and update it that way.
Whereas PUT replaces the entire record with new information. Delete is also an option here. It’s pretty straightforward. We will have an example of a DELETE call later on to remove the document we create. But first we want to get our connection. So, let’s choose GET. This is something I have learned specifically about integration server while working with it. Where is it? Connection here.
We don’t need to send any parameters along to get our connection. It’s going to look something like this. As you saw in the browser, when we retrieve it here, even in RPA, we just simply need to call the one connection endpoint. So that’s what we’ll do. So, we don’t need to specify any parameters here. In this accept setting here, what you’re seeing is a way of telling your robot what should I accept as far as a response body from the web service?
The first option here is pretty much a wild card, expect everything. And we’re going to leave it at that. But if you are expecting to have specifically XML, Jason or something else returned to you, you can select that. But for now, we’ll just leave it here. We have different options for encoding. We’re going to go ahead and leave it at UTF-8. Pretty standard.
And then for this test connection for the output we’re just going to load it in the browser to see what it says. But you would typically do an enterprise solution with RPA as store the output in some kind of variable, because most likely it’s going to be needed downstream in the robot to do something with that output. So, for now, we’ll just load it in the browser.
Depending on how the API is built, you have the option here to specify the credentials to send along. But we, with this API, are going to send them as headers. So, we actually have our username and password stored in these variables. So, what I’ve done there… And before I show you that, there’s also a more settings button here where you can dive in and look at all kinds of other stuff, such as SSL, TLS settings, and a lot else.
So, there’s really a lot of settings here available for each set. But the way we created this username and password, what I did was just create a type called credentials. And this has two attributes. For example, one attribute is username, the other is password, and this actually stores the string that contains that information. And I can show you that over here.
I actually have the password as a password attribute type. So, it’s showing us, as any password would when you type it into Facebook or something like that, it is hidden here. And you can see here the string containing the username. I learned working with integration server that the way we’re sending these is a little bit unique in RPA.
A lot of times you’ll send a token or something like that as a parameter, as part of the request, or you will just put in your username and password in the available credentials panel here in the step configuration. But integration server is a bit unique in how it’s expecting it. It actually wants two headers containing the information. And it looks something like this.
And so, there wasn’t really a clean place for me to put that. So, I stored it in variables and sent it along that way. But each API you work with is going to be unique. But at the end of the day, RPA has a way to do that for you. It just takes a little bit of playing around with to sort that out. So, we can test our step here by clicking to the next step.
And we can see in the output window, just as we saw in the browser, that we are able to connect to the integration server. So that was kind of a high-level overview of a call REST web service. So, what I want to do next is rebuild some of this from scratch just to show you how that all might be done. We’re also going to create a document, retrieve that document, send it back as an updated version, and then we’ll look into querying a Microsoft SQL database.
So, let’s go ahead and right click our robots folder here. Create a new web automation robot. We’ll call this office hours RPA. I can have the robot start from URL, which will essentially just create a load page step for me. But in this case, we don’t need to do that. Let’s click finish. It’ll take a second here and create a robot for us. With the latest release of Kofax RPA, version 11, we do need to prepare our execution here before we can start building.
So, I’m going to click prepare execution and then click yes. And then we can go ahead and get started. So, I’m going to leverage the same types I used in my current robot, because really what we need is that credentials variable which does contain a password to a system of ours. So, I don’t want to show rebuilding that. But it is pretty simple to create a new type.
You would just come into your types folder, right click, select type, and then new credentials. And then just add the attributes you need. So, these are kind of, again, creating the data model that’ll allow you to build variables for your robot to work with. So, what I did was just create username, selected short text, I believe. And then I put it in just as I have here with the actual username. Click okay.
And again, this is just showing you a demonstration of how you might store something like this if you’re working with an API that requires you to send along a header set of credentials, similar to what we have here. And then password value. And you can see, again, even when you put it in here, it is blanked out. But once you click okay, and if you were to expand this, you could see the actual password itself, the actual value you put in for that attribute.
So, it’s important to note there. You can set up security around management studio and design studio here where this type might not be visible to a certain end user, but they could still use build variables and the robot containing this. And when you create robots or create variables for robots that use these types, these attributes, if it is a password, it won’t show them at that point in time.
So, there’s a way to, even though you can see it here, hide that potentially down the line. So back to our robot here. Let’s go ahead and get started by adding our variable. Since that variable is built on a type, we can just select our type, which contains, again, that username, that password. And we don’t need to give it a name. If we just click okay, it’s saying we haven’t given it a name.
Do you want to just generate it based on the type? We’ll just say yes. So now we have a variable there we can work with. Now we can right click the blue circle here in the middle, which is called the end step. Add a step before and select the action step. Then what I like to do is just open the step configuration here. So, the first thing we want to do is get our connection to integration server.
So again, we’re going to use call REST web service. Worth noting here, RPA also has SOAP web service options available, if that is available to the API you’re working with. Again, today, we’re just working with a REST web service. So that’s what I’ll select. The URL. What you might do in a production environment, what we like to do is store this in a variable.
And then instead of typing it in here, you can click the carrot next to it, select a variable, and then it’ll load in that string from that variable. The reason you want to do something like that is if for whatever reason the end point you’re working with changes, then you just need to update the value in the variable, rather than going through each step where you actually are calling this endpoint and updating it that way.
So, kind of shortness the work, something like that. It also just is a cleaner kind of project building habit there as well. So, what we’re going to do though is just type it in here and totally go against everything I just said. And we will point to where we have this web service, which is on this server in our image now. And since I’m also going to specify the port…actually, I think I am missing a piece here.
And again, we can make sure that URL, the end point is correct by looking here. It is V1 and then connection. It is assumed that someone reading this understands that these end points are built on top of where you actually have the service deployed. So, integration servers and Apache Tomcat web service. Before I type in this part of it, I’m just pointing to the server and port that Tomcat is running on.
So V1 connection. We’ve got that in now. The next thing we need to do is choose to load in the browser here and then send along our username and password. Integration server requires that to authenticate. So, what we want to do is choose custom here, or variable rather. Sorry. And then choose username and the password variable that we have built.
And then with this specific call, we shouldn’t need to configure anything else. Let’s just click okay. And there it is. We are connected to integration server. You can see that here. The next thing we’re going to do is we will create a document and Perceptive Content. So if we look back at the documentation here and why is that, we can see that we just need to switch our end point to V1 document and then create a body similar to this in JSON containing the document meditator that we want to send along.
I have that already copied into file here. So, I will put that on my clipboard. All right. Click here. Insert another web service step. I will point back to our web service. The important part here is we’re no longer making a GET request. We are now sending data to the server. So, we’ll change this to POST. You can also see that… Not here, but you can see that in the documentation we were just looking at.
When we’re talking about the V1 document call, this is a POST call. You could also make a GET call to retrieve a document and a delete call. So, all that’s available. What we’re doing right now is creating one. So, we’ll use POST. Now, this is saying, how do we want to specify the details of our POST call? So, as we saw in the documentation, it’s expecting that JSON body.
So, we don’t want to use parameters here. We want to use a raw body. And then we can just click into edit and paste what we have here. Now, the way we’ll test this after we run this is, we can just search for field one equaling this. What you’re seeing here is the metadata of the document, which in Perceptive Content we need the drawer, at least one index key document type.
But we’re going to go ahead and send along all these field one through five, the drawer, the document type. So, what we’ll do when we test this, we’ll search for field one value. So, I’m going to show you that now just to show you the document doesn’t currently exist. I’m relogging here. I’m going to switch to the all documents for you.
And again, we’re doing field one is equal to… And again, this is what we’re going to send to create our new documents so they should not exist. And again, no documents found. So, we know that doesn’t exist. So, we’ll take our full body, paste it into the window here and click okay. You can also store these JSON bodies in a variable or you can use an expression to create the JSON body that you need to send.
Content type of what we’re sending is JSON. So, we’ll switch that. Again, we’re going to go ahead and accept whatever they send back. We don’t need to specify JSON or XML with that here. And then we need to switch that. We have to select an option for output here, but we can just select load and browser for now. And again, we need to send our credentials as header.
Now, with integration server, the best practice for working with it would be to get a session hash, which you can do by using one of the connection end points from it and storing it. But for here, just to show at a high level of creating these web service steps, I’ve decided to just pass it in each time and then clean my connection up later on.
So, we should have everything that we need, our credentials, the new document end point. It’s a POST request. We’ve got our body with our document metadata pasted in there, and we’ve told it to expect JSON. So, let’s click okay and click the instep here to test. So, we didn’t get an error. Typically, you’ll get an error if something wrong happens there.
So, let’s see if our document has been created. And we’ll just grab this to make sure it’s on our clipboard. And there we go. Now we can see that our documents have been created in the all documents for you, with all of those index key values that we sent along. The name is uniquely generated. We’ll take this and paste it onto our clipboard here so we can use it later on.
As you can see, there’s no pages attached to this document here. With integration server, there’s a separate call available to actually send pages to a specific document and image now. But for now, we’re not going to do that. As long as we have the metadata here, we can share that we have a document we can work with as we need to. So, we will head back over here.
The next thing we want to do is make another GET request to integration server to get the document metadata. This is going to not only contain what we just sent over, but also some other information that we need to work with down the line such as our location ID that we’ll need to update the document. So, we’ll right click the end step here, create another web service step.
Oops. This part is going to stay the same. Let’s go see here in a second what our GET document end point looks like. Okay. So, with GET document, we just need to change it to V1 document, and then we will add a ID at the end of it and make sure we’re using a GET request. And this should show what the return is going to look like. Yep. So, it’s going to be a JSON body.
And you can see it’s going to get us that location ID, which we’ll need, and you’ll see here in a second, to update the record in ImageNow. So, we need to change this to load in the browser. And let’s send along our username and password again and update our endpoint. So, after document, we need to add the ID of the document we just created, which should be on our clipboard still. There it is. And we have everything we need.
Let’s click here and execute the web service. Okay. So, you can see in the results window down here that we do have a response from integration server and the document node, which we can expand here with the little arrows. So, let’s pop this open all the way. Down here is the properties window. The document we’re working with today has no custom properties. If there were some, it would be loaded here.
You can use integration server, and specifically you can use that POST document call we already used to send along some custom properties. But with this document type we’re working with it doesn’t require any custom properties and it’s pretty redundant as far as what that entails. It’s pretty redundant to what we’re already doing with the document keys.
So, we’re going to skip that for now. But let’s pop open all of these. We’ll see that location ID that we need. And this is working based on something I’ve already done. So, I do know that I need this location ID to update the document. We could have found that out, again, just by looking at the documentation here, looking at the PUT request, which is kind of our update method and seeing that the request example requires this location ID, as well as everything else we want update the document with.
So, kind of working ahead here. But since I know we need that location idea, that’s why we’re doing this step. So, we will copy the…whoops. Sorry. Let me click past that. Now we’ll take the location ID here. And we’ll actually copy it into a temporary variable so I can put it on my clipboard, and we can use it when we make this next update step.
I must have had the wrong things selected there. Let’s delete this step. And instead let us actually create a body to hold our return end from this web service so that I can then work with it to…I can open that variable. I can work with each piece of data that’s returned for that record. So, let’s just create a JSON type variable here called return, or it’ll often be called response body in the world of APIs.
And select JSON, because that’s what we know is being returned to us. So, let’s open back up our web service step here where we are doing the GET document. And instead of loading in the browser, let’s extract it to a variable to our response body, JSON variable. And then if we click past it at this time, we have an error. So just to be explicit, let’s change this to say that you should accept a return of JSON and close this and double check.
Yeah, that is a JSON variable. So, let’s try this again. Yep. Now it works here. So, since we are telling our call REST web service step here at the end to instead of loading into the browser, we’re telling it to extract the response to a variable and that variable is JSON. We need to be explicit in what we’re telling the API step to expect as the response type. So that was the issue I had there.
So now if we click past this, we can see there’s no error. We’re also not opening that variable quite yet, so we can’t see anything else down here. But on the right-hand side in the variables pane, if we look at our response body variable and click view, we can see everything we just saw loaded in the browser now stored nice in a JSON variable. So, if we want to get that here in our response view, what we’ll do is add a step to do that.
So again, just right clicking the end step, adding a step before. And then hop into the configuration here, we can choose open variable. And this is often how you would work with data being returned in a enterprise solution with RPA is storing the response from these requests in a variable so that you can loop through the records that are returned and extract a certain piece that you need to do something else with downstream.
So, this is an important part of working with API is to grasp an RPA. You can see how easy it is. We just created an empty variable to hold our response body and chose the JSON type. There’s also an XML type. It depends on what you’re working with. It’s saying either XML, JSON or Excel variable. We’ll select the JSON variable we have here.
And this step type, open variable, is really easy to work with. All we need to do is select the variable that we’re trying to open and click past it, and we can then expand it. And now that this is stored and we’re opening this variable, you can see we can actually click here. We can copy the value and we can set this aside to work with later.
We’ll need this location ID to update our document. We’ll also need, I believe, to go grab the document ID once again. And then we can jump into sending that update request. But I just wanted to show you how easy it is to work with the response body of these requests. You can actually see that you can just click the row of the record you want and right click it.
You can extract it from here. From there you could do comparisons of two values, really anything. That’s where the complex logic building with RPA comes into play there. And even that kind of thing is just pretty easy, simple to do with RPA. It’s just knowing a couple of steps to get you there. So, we have our variable open here. Let’s start creating another web service step.
And this one, bear with me, is going to be our PUT request on the document operation. So, again, you can see that it’s giving us an example of the request endpoint, which is the V1 document, and then just a unique document ID. So, it knows which document we’re talking about. And then the field values that we want to update for it. I have this saved locally on my RPA machine as well.
So, we will grab that. First, let’s grab our document ID actually, because that’s what we’ll need to build the URL. So again, this is the document we created in ImageNow just a moment ago. I’ll copy that, close this. And then we can build our URL. Oops. And then I had the document ID. Okay. And so, we’ll change this to a PUT. Again, think of this as an update.
We need to send a JSON body. So, we need to switch this. And then I have an example of that update document call here. So, I’ll just copy from here. This is what our field one through five currently read as up top here. And so, we’re just adding that we’re testing the update. So, it should look like this in ImageNow when we retrieve it here in a moment. So, we can click edit and paste that in there.
We just learned that we need to be explicit with what we’re telling it to expect as far as the response. So, let’s switch that to JSON. With the update here, we don’t need to store any of the response because we’re just going to go look in ImageNow and make sure that it in fact updated. And then we’re going to show an example of a delete document. So, this one we can just load in the browser.
We do need to add our username and password though. So, again, our document key is to just look a bit different here in a minute. As you can see, it says Kofax RPA test field one, whereas it’s going to say testing update field one instead. So, let’s click okay. And we’ll step through this to make sure it executes successfully. And we have another issue here. So, let’s see.
Maybe I misspelled something. So, let’s go in here. Let’s double check our URL. So, everything up to this point… The V1 document looks good. Let me make sure I have the correct document ID on my clipboard here. That it all got pasted in. Okay. That looks to be good. Oh, maybe we need… Switch this again here since we are sending specifically JSON.
Oh, you know what it is? We didn’t put the location ID that I spent all that time getting into the location ID parameter. And to double check that, what we can do is we can just click back I believe it’s this one to our GET document step. We can step through it again. And then we can open our variable again here. Ending in 17. Let’s make sure that was it. Yeah. Okay. So, let’s pace in our body again once more.
This is why it is good to work with a tool like Postman before you hop in here and start building these steps because it can give you a bit more information at least immediately on what you’re doing wrong. And it also just has things separated a bit more to where you can test that. Also, you’ll know your issues really before you get in here to begin with. We also need to update the document name here.
Let’s try since we’re sending the ID. Okay. So, I think we need to add our name as well. So once again, let’s go back to our open variable step. Click past it. And we can see there’s a name field as well. So, let’s expand that. Copy our value here. And once more grab our body here and update it in our step. Now we should have no issues. We still do. What is it this time? Internal server error.
So, if you see a 500 error, that typically means there’s something wrong on the web service you’re consuming. So, it looks like maybe I have sent along an extra set of quotations there. Let’s update our step really quick one more time. Hopefully that’s in it. Replace our document with a funky looking value for name. There we go. So, no response here is good in a way. There’s no errors.
Let’s head over to ImageNow and make sure our key is updated as we expect. And you can see now it says Kofax RPA testing update field one. So, our update call worked here. This is just a high-level example of how you can connect to a web service, make a basic GET, PUT. And then we will show a delete step here. So, I think with the integration server doc delete call, it’s pretty simple. It should be up here somewhere. There it is.
Yep. Just the V1 document end point. And then we need to append an ID to say which document are we deleting? And there’s an example of that URL. So, we will head back over to RPA. We know our document ID is in this step. So, we can just grab it from the end of it. In fact, it’s this entire same URL that we’re using. We just need to switch our request type delete.
So, I’m going to copy this out of here. Create a new web service step, paste in my URL, change this to a delete. And then we can just load this in the browser. We’ll just go search for our document after we delete it here to make sure it’s been deleted. We just need to send along our username and password. Click okay. Again, you can see it’s the same URL to the document end point.
We just need to append our document ID and make sure we’re making a delete request, which we can see here. Let’s click past it. Alright. No errors. So, if we head back over to ImageNow, this is the document we’re looking for, or we can just search as we did before with field one. And it’s already, as you can see, not returning any documents. So that’s how easy it can be to create, update and delete data using a web service in Kofax RPA.
The last thing I want to show you here is how to set up a connection to a Microsoft SQL server database, and we’re going to query to return our document. So, first thing we need to do is create our document again since we just deleted it. So that’s a GET request. Let’s go back to our POST request that we did containing all the document information. And we should be able to just click past it here to execute that again.
And then we should be able to go see that our document is created. Oops. Let’s just change these really quick to a unique value. Alright. Make sure our document is there. Field one, SQL 2. And there’s our new document. When we get to working with SQL, we’ll return this document. So, when you’re working with Microsoft SQL server, you have to go through a couple steps to set up a connection to the database first.
So the first thing we need to look at is, and this is something I’ve already done, but I’m going to show you where you would do it, is you need to upload a database driver for the management studio for roboserver to work with so that it can connect to your database. So, in management studio… And if you’re not familiar with management studio, it’s pretty appropriately named.
It is a management…or management console rather is a management UI deployed in the browser for you to go look at your RPA instance as a whole. Some administration can be done here. This is where you could upload your robots from one location and distribute them across your environment if you’re not a test development environment like mine here. But to upload our driver, what we need to do is go to the admin tab and then I believe settings.
And then over here on the left, you can see database drivers. And you would just take your driver and upload it here. Which driver you’re going to need depends a little bit on a couple of factors. Here with Microsoft SQL server, and you can typically just this kind of thing and find your answer pretty quickly, what you need depending on the database type that you’re working with.
I just found the Microsoft SQL JDBC-8 driver and uploaded it. So, this is where you would upload that. And you can see here below the drivers there’s a list of any that we’ve uploaded and information on that file and when it was uploaded. The next thing we need to do is we need to define a connection of this database to the roboserver. So, where we would do that is go to robo servers here.
And then there’s a settings icon we want to click here. This is our non-production cluster here. So, we’ll click the settings icon. and you can see there’s a database that’s dropped down here. So pretty straightforward with what you want to do here. We could click add a database, give it a name. This isn’t necessarily the name of the database. This is going to be a unique identifier within your RPA instance.
So, let’s just call this test connect, because we’re going to use this ImageNow database connection I already have. But I’m going to show you how you would create the connection fresh here. So, we’re going to point to our server where we have Microsoft SQL server deployed; in this case, the default SQL server port. And then schema. So, this is where it actually wants the name of the database.
So, we’ll hit the database drop down menu here, that database type dropdown, and select Microsoft SQL server. and then give our login here. And you can see the password is somewhat secure here when you type it in. So, I either made a typo on the password or my host reference is slightly incorrect here. We may not need that. Let me retype this password.
Yeah. I think we just need…login failed for end user. Once again, I might have an issue with the password I’m typing in. Let me just test the connection I already have to make sure that’s still working. Still you should see how easy it is to define your database there to the roboserver. I just need to specify some pretty basic connection information here.
So, on this one, I’m not sure exactly what I was doing wrong there. But we’re testing successfully with our I end user login. I may have had something wrong in the host name there. You just need to give the host name port and then the credentials and database name and the schema part here. So, our database is defined to the roboserver. So, we’ll click okay. Out of here.
The next thing we need to do is add the database to the list of databases here in design studio, which we’ve already done here. Let me see if I can add a new one. I’ll use the same connection that we just defined to the roboserver. So, you want to click properties after right-clicking the design studio databases here. And you can see here we have that EP1 connection we just tested. But I’m going to add another one.
So once again, add my host name. And again, it doesn’t like what I’m typing in here for the username and password. But again, this is just a little bit of redundancy. And really this is pertinent when you don’t have a distributed environment. My test environment here is based on the Kofax RPA trial license. In a distributed environment, the reason you define a roboserver first is so that you can have that database connection available across the different RPA installations against various design studio instances.
Here I’m just showing you through the steps of both so that if you were to have an enterprise system, you would see how that set up. But we really just need to use the connection we have here. There may be too many idle connections already to the database here or something else going on. But we’ll use the management connection we already have built here and test it and you could see it’s working.
So now we’ve added this. We can see that the INOW EP1 database will be available in design studio. So, the very last thing we need to do is create a database mapping. So, I have a folder specifically for that. And again, I might not be able to build multiple mappings with the same database connection here, but we can look at what that might look like.
So, we can hit select database here. You’re seeing that we have, again, if this were a distributed environment, the connection to the INOW database. We also have the connection. Since this defined a roboserver, we were able to build it as a design studio connection here. We can select it, give it a unique name, and click finish. So, this is just the kind of piece that you need to build in your project folder.
Because when we make a database connection step or a database query step, it’s looking for a database mapping. So, there’s kind of three steps to creating your database connection here. But once you have that, all the sticky stuff, all the connection, string information, all that’s out of the way. You can just get to work on working with your database.
So, we have these. Let’s look at what steps we might need to do to query our database for that document. So, create a new step here at the end. Let’s configure it to be…and if you look through here in the select action menu in RPA, you’ll pretty much find anything you can imagine. So, I am looking for something that has to do with querying a database. We can see we have a database section here and a query database.
So here is the configuration for creating a database. You can see the two database mappings we’ve created here pop up when we click the selected database dropdown. I will select that, one of the INOW databases. They’re both the same in this case, so it should no matter and then from there, that is where you would write your query and continue on with how you want to store that data that’s returned.
The first thing I want to do is let’s just query this in management studio itself and see exactly how we want to build this query. So, I know the ImageNow database well enough to know that the table we want to query here is the INdoc table that stores all the document metadata. And here, if we just write a query like this one here that says to select all these columns from the IN doc table and filter it by the doc ID, which we know for the unique document we created this should return the one result we’re expecting, which is that document we created.
So, to do this, we just need this doc ID. Let’s grab that really quick from ImageNow. Copy it. And then we can just paste it in. Highlight and execute our query. And you can see it’s returning one result with all these different pieces of metadata for that document we created. So, this query here should work. In the editor window here, it wants everything within these quotations.
So, we’re going to just type over this part and just paste in our query but leave the quotations that were there. And you can see the output. It looks like our query minus the quotations. So, click okay there. Our query should be good. The variables map is the next section here, and you can see it’s required. This is saying, how do you want to restore the response from SQL? So, the response is going to look something like this.
So, one record with all these different columns. So, we need to build a variable or a container to store values for each one of these columns. So basically, we’re going to build a variable or a type called IN doc, and it’s going to have an attribute for each one of these columns. We actually already have one built, but I’ll show you how that works.
So, for now, we’ll just cancel out of here because we need to build that first. And here’s my IN-doc type. Again, you can see it has an attribute for each one of these columns. for all of these I used to short text. I made sure it was storable. And if you wanted to build this type over again, just right click your types folder, new type. I named it IN doc because that reflects to me best what it’s storing is a record for a search against that table.
So, for the sake of demonstration, we’ll just call this table name. And then I just came in here and added an attribute for each type. So just a little tutorial on how you might build a data model for querying whatever database it is you’re working with in the future. You can build it out into a type reflecting the table structure that you’re querying. But we have a IN doc table replicate built here. So, we’ll just use it.
I’m just going to head back to our robot. We will add a new variable using the IN doc type. And you can see it’s anticipating a value for each one of these columns. So, we’ll click okay. Again, we’ll let it generate the name of the variable based on the type. We’re erroring here because it has an ID from an old document we created when we had created a new document just a few minutes ago.
So, we’ll just disable this for now because we’re no longer worried about this step. We’ll just disable these. Right now, we’re just worried about querying SQL. So, we’ll hop back into our database step configuration. And because I didn’t complete it all with the required settings, it’s going to make me do it again here. But that’s okay.
So once again, we’ll select query database, select the database mapping. We can head back over to management studio to grab our query. Click edit here. Make sure this isn’t the quotations. You can see our output looks like an actual query. Click okay. And then we’ll set up the variables map. So, it’s having this map a column name to a variable. And so, the column name, we want to call the actual name of the column.
I’m going to pull this up on my other screen so I can kind of type this out as I go here. So, it’s just going to be each one of these columns, each piece that’s built on the IN doc type we’re working with. And we will line this up with the doc ID attribute of the IN-doc variable we created. This piece of it is a little bit repetitive. But once you set up this kind of thing, it tends to work flawlessly.
Next is doc type ID. And you don’t necessarily need to return or store every column. Again, my query is pulling back a handful of the columns available on this table, about five of them. So, since I am querying and telling it to give me the value for this column, for this specific record, I do have to give it a place to store that. I’m going to call this field one.
I call it field one here in my type because that’s what it means to me. But folder is actually the column name. This means field one in terms of the image not database. So, try not to be confused if you see folder here. It really just translates to field one. And almost done here. We don’t need to update windows right now. Again, this one looks a little weird, but this really just means field two.
It is the column name for that. Alright. And that should be every column we told it to expect here. Yep. So now we have a roadmap on how we want to actually store that data coming back. There’s a couple other settings here. But for what we’re doing, we don’t need to worry about these. So, we’ll just click okay. And you can see our query database step is highlighted here.
So, if we click past it and it works, we should be able to see data populated into our IN doc variable here. Yep. We can see just as we see in management studio. I’ll bring that back over. You can see that it is bringing back the value for each column we told it to expect. So, it can be that easy to work with APIs and SQL server and Kofax RPA. You can also set up connections to Oracle, whichever DVMS you use.
Today we just wanted to demonstrate Microsoft SQL server for our ImageNow database. There are also steps available in Kofax RPA to do other things with databases, such as send a query or execute a block of SQL to actually delete or update records, just whatever it is you need to do. You would just want to explore the different database action types you have available here.
So, you can see there’s an execute SQL step, delete, all kinds of stuff here. So, RPA is pretty robust, and we hope that this demonstration helped kind of show how easy it is to set up RPA to work with various APIs and databases. So thank you for watching. If you have any questions about what you saw today, please feel free to reach out to us through our YouTube channel, through our website, rpic.com, or email us. Thanks for tuning in.
Want More Content?
Sign up and get access to all our new Knowledge Base content, including new and upcoming Webinars, Virtual User Groups, Product Demos, White Papers, & Case Studies.
Entire Knowledge Base
All Products, Solutions, & Professional Services


Contact Us to Get Started
Don’t Just Take Our Word for it!
See What Our Clients Have to Say
Denver Health
“RPI brought in senior people that our folks related to and were able to work with easily. Their folks have been approachable, they listen to us, and they have been responsive to our questions – and when we see things we want to do a little differently, they have listened and figured out how to make it happen. “
Keith Thompson
Director of ERP Applications
Atlanta Public Schools
“Prior to RPI, we were really struggling with our HR technology. They brought in expertise to provide solutions to business problems, thought leadership for our long term strategic planning, and they help us make sure we are implementing new initiatives in an order that doesn’t create problems in the future. RPI has been a God-send. “
Skye Duckett
Chief Human Resources Officer
Nuvance Health
“We knew our Accounts Payable processes were unsustainable for our planned growth and RPI Consultants offered a blueprint for automating our most time-intensive workflow – invoice processing.”
Miles McIvor
Accounting Systems Manager
San Diego State University
“Our favorite outcome of the solution is the automation, which enables us to provide better service to our customers. Also, our consultant, Michael Madsen, was knowledgeable, easy to work with, patient, dependable and flexible with his schedule.”
Catherine Love
Associate Human Resources Director
Bon Secours Health System
“RPI has more than just knowledge, their consultants are personable leaders who will drive more efficient solutions. They challenged us to think outside the box and to believe that we could design a best-practice solution with minimal ongoing costs.”
Joel Stafford
Director of Accounts Payable
Lippert Components
“We understood we required a robust, customized solution. RPI not only had the product expertise, they listened to our needs to make sure the project was a success.”
Chris Tozier
Director of Information Technology
Bassett Medical Center
“Overall the project went really well, I’m very pleased with the outcome. I don’t think having any other consulting team on the project would have been able to provide us as much knowledge as RPI has been able to. “
Sue Pokorny
Manager of HRIS & Compensation
MD National Capital Park & Planning Commission
“Working with Anne Bwogi [RPI Project Manager] is fun. She keeps us grounded and makes sure we are thoroughly engaged. We have a name for her – the Annetrack. The Annetrack is on schedule so you better get on board.”
Derek Morgan
ERP Business Analyst
Aspirus
“Our relationship with RPI is great, they are like an extension of the Aspirus team. When we have a question, we reach out to them and get answers right away. If we have a big project, we bounce it off them immediately to get their ideas and ask for their expertise.”
Jen Underwood
Director of Supply Chain Informatics and Systems
Our People are the Difference
And Our Culture is Our Greatest Asset
A lot of people say it, we really mean it. We recruit good people. People who are great at what they do and fun to work with. We look for diverse strengths and abilities, a passion for excellent client service, and an entrepreneurial drive to get the job done.
We also practice what we preach and use the industry’s leading software to help manage our projects, engage with our client project teams, and enable our team to stay connected and collaborate. This open, team-based approach gives each customer and project the cumulative value of our entire team’s knowledge and experience.
The RPI Consultants Blog
News, Announcements, Celebrations, & Upcoming Events
News & Announcements
How to Avoid ERP Project Delays Before They Happen
Chris Arey2024-07-23T19:46:19+00:00July 23rd, 2024|Blog|
Why Your Company Needs an ERP Disaster Recovery Plan
Chris Arey2024-07-09T18:57:13+00:00July 9th, 2024|Blog|
ERP Partner vs ERP Vendor: Understanding the Differences
Chris Arey2024-06-19T13:51:15+00:00June 18th, 2024|Blog|
Top 4 Takeaways from Infor Connect 2024
Chris Arey2024-06-12T12:49:00+00:00June 4th, 2024|Blog|
RPI Consultants Launches Yoga Vendor Portal: Simplifying Payment Exchange Details and Streamlining Supplier Communication
Chris Arey2024-05-17T18:53:33+00:00May 16th, 2024|Blog, Press Releases|
High Fives & Go Lives
AP Health Check at Jeffries Creates Path for Increased Efficiency, Visibility
Michael Hopkins2024-02-26T13:51:02+00:00November 30th, 2020|Blog, Brainware, High Fives & Go-Lives, Perceptive Content / ImageNow|
Customer Voices: Derek Morgan, MNCPPC
RPI Consultants2020-12-16T17:50:32+00:00August 14th, 2020|Blog, High Fives & Go-Lives, Infor CloudSuite & Lawson|
Voice of the Community: Jen Underwood, Aspirus
RPI Consultants2024-02-26T06:04:23+00:00March 14th, 2020|Blog, High Fives & Go-Lives, Infor CloudSuite & Lawson|
Voice of the Community: Keith, Denver Health
RPI Consultants2024-02-26T06:01:19+00:00March 14th, 2020|Blog, High Fives & Go-Lives, Infor CloudSuite & Lawson|
AP Automation Case Study at Nuvance Health
Michael Hopkins2024-02-26T13:48:07+00:00March 4th, 2020|Blog, High Fives & Go-Lives, Infor CloudSuite & Lawson, Knowledge Base, Kofax Intelligent Automation, Other Products & Solutions, Perceptive Content / ImageNow|
Upcoming Events
RPI Client Reception at CommunityLIVE 2019
RPI Consultants2024-02-26T06:09:32+00:00June 20th, 2019|Blog, Virtual Events, User Groups, & Conferences|
Free Two-Day Kofax RPA Workshop (Limited Availability)
RPI Consultants2024-02-26T13:24:38+00:00June 13th, 2019|Blog, Virtual Events, User Groups, & Conferences|
POSTPONED: Power Your Logistics Processes with a Digital Workforce with Kofax
RPI Consultants2024-02-26T13:29:29+00:00May 29th, 2019|Blog, Virtual Events, User Groups, & Conferences|
You’re Invited: Customer Appreciation Happy Hour
RPI Consultants2024-02-26T06:27:45+00:00March 14th, 2019|Blog, Virtual Events, User Groups, & Conferences|
RPI Consultants Sponsors 2019 Michigan Manufacturing Operations Conference
RPI Consultants2024-02-26T13:53:21+00:00January 30th, 2019|Blog, Virtual Events, User Groups, & Conferences|